Saturday, November 28, 2009

Eduardo's Finished Frame

Eduardo's frame is on it's way to Colorado on Mon., here's some finished photos.


I wanted Drew to take a shot of this detail on the underside of the dropouts. I've been finishing them this way for a while, but haven't had a photo of it yet. I make a point on the bottom face of the dropout and then this gets masked along with the dropout faces. This takes care of the two most commonly chipped areas on the dropout.

The polished stainless head lugs with the head tube logo painted on. Jason has mastered the plotter, so now my logos are paint rather than the black and white decal. This way, they can be customized to match any paint scheme!

Finally, the polished fork crown. I like this shot, if you look closely in the reflection, you can see the frame sitting on the table opposite. Pretty shiny!


More soon!
Dave

Tuesday, November 24, 2009

Kevin's Finished Frame #24

Just finished up Kevin's frame yesterday afternoon and dropped it off with Jason. A very classic, simple road frame.

I tried a new bottom bracket on this one. It starts out life with fleur de lis' on all the points and a couple points on the sides of the down tube and seat tube. I carved it back a ton, and I'm pretty happy with the finished shell. I always add a second drain hole with the cable guide mounting hole.

The full frame and fork. Kevin's going to have it painted black with a white panel on the down tube, black lettering and a white head tube logo. Very stripped down and minimal.

I resisted using this seat lug for a while, as it reminds me of the Serotta Atlanta, which was the lower end model I built quite a few of during my time at Serotta. The Serotta lugs had an "S" cast into the flat side panel and I just got tired of the look. Last year I decided to use this lug on my "Modern Classic" for the NAHBS, since it matched the head lugs and it is ideal for mounting the fastback style seat stays. Since then, I'm warming to it's shape, and I'm using it more and more with the 1 1/8" head lugs from Long Shen.

Some added touches in the lug corners, and I've carved the band a bit also.

The Ellis dropouts with skinny seat stays attached! When I use these dropouts with 953, the stays really engulf the dropout ends, but with a standard 14mm double taper stay, the ends are so dainty! I must say, I prefer the thinner look, and they ride really nice too.

A final shot of the fork dropouts, nice and tidy!

Should have pics soon of Eduardo's frame. If you've been watching the blog, you'll remember he had the compact frame with stainless head lugs, seat lug and fork crown. He chose a beautiful shade of orange for the frame and it's completed with white panels and red pinstripes and Ellis logos. Quite stunning!
Cheers,
Dave

Ellis in Patagonia

Gotta hand it to my brother Steve, he's a tireless supporter of Ellis Cycles and the proud owner of last year's NAHBS bike! Some of you may know that he works for Patagonia in Ventura, CA. Well, with his help and some contacts in the Chicago Patagonia store, I've got my personal road bike on display through the holidays at their store.

http://www.patagonia.com/web/us/patagonia.go?slc=en_US&sct=US&assetid=1936


I've got a kinda blurry shot of the bike that was forwarded along below;


If you're in Chicago, go check it out!

Tuesday, November 17, 2009

Kevin's Road Frame

Kevin has been waiting patiently for news of his frame for a few months, and I tried to take more pictures of the process for him.

Below I've got all the tubes, lugs, dropouts and bridge laid out and ready to start.


I've raked the blades, slotted, brazed the dropouts and cut the blades to length. Ready for...


The torch!


I've cut some circles in the lug corners and just modified the lugs a bit. Plus all the points have been sharpened up.


A bit out of order here, but below are all the tubes, mitered and the fork after brazing and a good soak.


Mitered tubes, set up in the fixture.


Bottom bracket dry fit.
Down tube miter, nice and tight!


The inspector makes an appearance!


The frame tacked up. I've checked the alignment and now it's ready for brazing.

Head lugs and seat lug after brazing.


It's soaking as I write this, I'll post more tomorrow!

Friday, November 6, 2009

Chad's Triathlon frame

Chad called me early this summer to ask if I could build him a unique triathlon frame. He was tired of having the same bike as everyone else week in and week out at all the races. While a steel tri frame would be unusual enough, I decided to use a technique called bi-laminate for the joints due to the unusual angles that a tri frame presents. I learned how to do the bi-laminate style while I was starting out at Serotta, but we just called them "half lugs"! Bi-laminate sounds so much more refined, right? ;-)


I've got the fork built, it's getting chromed, and then the rest of the tubes and lugs prepped and ready to go. Chad also wanted to go with polished stainless chain stays, I've got the parts above, but I brazed the main diamond up first.


Here's the finished frame, bi-lam lugs, aero seat stays, and stainless chain stays and dropouts.
I think Chad will be the only guy at the races with a frame like this!


I did a slightly different treatment for the seat stay ends, hopefully this will make it a nice clean mask line for the paint to polish transition. The stays and dropouts will be polished, but the tricky thing is, how to do the transition to paint.


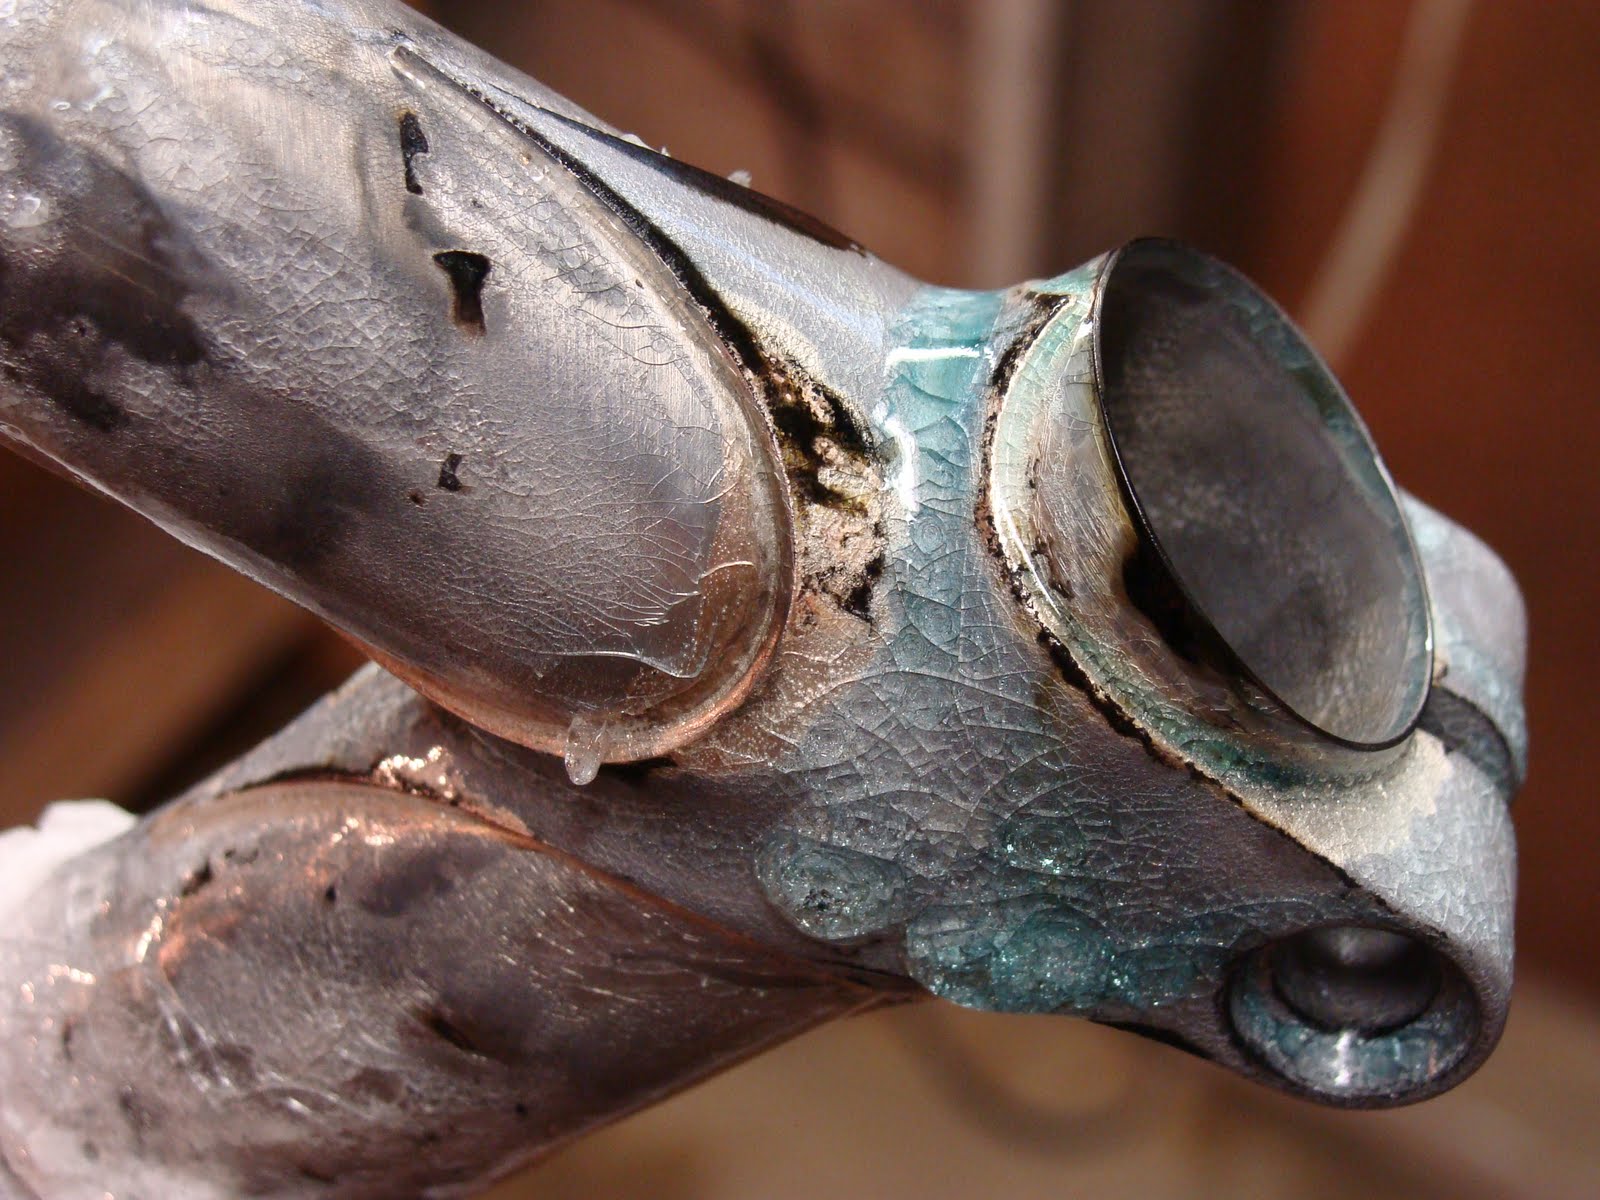
Down tube lug with barrel adjuster and shifter stops on the down tube.


Seat lug with the massive aero seat stays attached.


Top tube lug.


OK, these last couple are some shots of the next frame in the quene, I got a start on it yesterday. Pretty standard road frame, some small lug carving and it'll have a stainless drive side chain stay and a chrome fork. Should be pretty classic.


Monday, November 2, 2009

Jon's 650B Randoneer


Well, if you've been watching my blog you would probably conclude that I haven't been building anything lately. Actually, I've been quite busy in the shop and just haven't made the time to update all the recent projects I've got going. Here's a start!


Just got Jon's 650B rando frame back from paint last Mon. Drew took the glamour shots and here they are!

The custom built front rack. It has a threaded boss for the fender mount in front and then two bosses on the side for a nifty LED flashlight mount. This frame and Selena's frame are also unique in that the head tube logo is painted on, as opposed to the decal that I've been using up till now. It allows for more customization of the paint schemes than ever before.


The bottom bracket. That chain stay bridge looks really far back, but with the 450mm chain stays and the 650b tires it's just right. In the bb, I've drilled two holes, one for the cable guide to bolt onto, and a larger one for water drainage.


Kinda basic rear dropouts, but I added stainless faces to the dropout and the fender mounts.


The seat cluster. I usually do a little one sided canti brake stop, but Jon really liked this look. Fab'ed it out of some 4130 rod and a split guide brazed on. Easy to slip the housing out of the stop to release the Mafac Raid brakes that Jon's going to be running.


Like I said, I've been busy. Look for updates on Chad's cool bi-laminate lugged triathlon frame soon and Eduardo's stainless lugged frame which is heading to paint today!
Cheers,
Dave